Monday, January 28, 2013

Sprocatti Reed Valve Kickstart Update

Sprocatti MHR Big Bore


The long promised update. It's been a long day's work! But it has finally been finished; at least the main course was: fitting the crankshaft into the crankcase. The cylinder is a direct fit, just needs some base gaskets-adjustment to properly fit on to the engine.

The crankcases were a right bitch.... Honestly. This is exactly what I expected, but I hoped it were not to be the case. The cases fitted on to each other perfectly, but when they did, they were too tight. The crankshaft simply didn't turn freely. It needed too much force to pull through.

It was clear; a case gasket was needed. Obviously these don't come stock, so time to break out the cutting board gear and custom fit two gaskets.

You might say: Isn't that obvious? Well no, it isn't. Usually the aftermarket crankcases should take into account the extra clearance needed for the crankshaft, but let's face it, it's not a Polini or Malossi case where everthing is fucking prefect. Custom crankcases need custom work. So stop bitching. This is one of the best engines out for Piaggio / Vespa. No faith? Then go fuck yourself...

I custom cut some case gaskets to fit the crankcases and the job was done. It took an hour or two; better safe than sorry. The engine fit together like a charm after fitting the gaskets. The crankshaft moved freely and all was well.


Kickstart Parts
As we have mentioned before, this engine will be started via a kickstart system. We have pearl blasted a kickstart pinion and totally rebuilt it (with a new HK 1514 bearing). It now moves smoothly.


It still does not fit on the engine proplerly. The Sprocatti engine's crankshaft still sticks out about 3 to 4mm too much. We will soon be milling a new adaptor piece for the kickstart adjustment. We can simply place rings to make up for the space, but let's be honest, how lame is that? We wouldn't be MOPARTS RACING if we weren't the best, right?

Now drool at some pics:

Look how close that crankshaft runs through the casket/inlet housing. It's a millimeter of clearance, tops.. (roughly 3/64 inch for my American friends)...


Sunday, January 27, 2013

Sprocatti Reed Valve - New Project!

Here's the latest addition to the family: Sprocatti Reed Valve engine.


Full specs:

  • Sprocatti Reed Valve Kickstart engine
  • Malossi MHR Big Bore Cylinder Kit (XSH tuned) Liquid Cooled
  • Custom kickstart crankshaft (46mm stroke)
  • HPI Internal Rotor
  • 21mm Dell'orto Carb
  • Exhaust: Not yet chosen / To be determined
This engine is the "little brother" of the Sprocatti Rotary Valve (Disco Rotante) engine. It's got a nice reed valve port at the rear bottom end of the engine. This is the 4-stud version. It is also available in a 3-stud form so that you can mount normal Vespa / Piaggio cylinders to it (with a push start system).

The reed valve system is actually a manifold and petal system in one. The Malossi cases for Vespa / Piaggio have a seperate V-force 4-petal reed valve system and a seperate manifold. This Sprocatti Reed Valve system is two-in-one. It also has a more direct flow through the chamber to the cylinder (if modified properly). This engine has a lot of potential, but it needs a bit of fine-tuning and finishing before usage, but that's normal if your building a complete engine from scratch.

Kickstart Modification
This engine has the option for a kickstart system. It's not stock. The engine is delivered from Sprocatti with the small case milled falt down but still closed. You need to mill open the small half youself to have the crankshaft fit through. We've already completed this step.

The crankshaft has also already been modified. The bearing pen which sits on the right half of a kickstart crankshaft was pressed out of the crankshaft half. We then milled the a hole into a all-round racing Vespa / Piaggio crankshaft and press fitted the kickstart bearing pen into it.

The normal crankshaft for this scooter cylinder is a 44-stroke. This engine requires a 91mm long connecting rod. We used a Top Racing 91mm connecting rod (originally meant for Zundapp / Kreidler) and fitted this into the crankshaft.

As you can see, all this is needed to properly adjust the crankshaft for this engine, otherwise starting it will be a bitch (just as is the case with our other Sprocatti Rotary Valve engine). The crankshaft adjustment is a precise and expensive modification if you have it done by a third party. Why? Think about it:
  1. You need to buy a kickstart set (crankshaft, pedals, spring, axle, etc.; difficult to find!). You will need to sacrifice the crankshaft as you only need the kickstart part off it.
  2. You then need to press it or have it pressed out.
  3. A new crankshaft is needed, preferably a 46mm stroke crankshaft for a Liquid Cooled cylinder kit.
  4. To be on the safe side you may want to place a thicker connecting rod into the crankshaft. The stock Vespa / Piaggio ones are rather thin and weak. I'm sure they would hold, but a Top Racing connecting rod from a Zundapp / Kreidler is only about 30 euros (45 dollars) and is far thicker and sturdier.
  5. The crankshaft then needs to be refitted and aligned properly.
Fine tuning
The finishing on the engine is acceptable, but it's definitely advisable to break out the pro-tuning tools to finish the engine off properly. The cylinder has already been tuned by a Dutch tuning company, XSH. The inlet of this Sprocatti Reed Valve engine can still be raised and widened if desired. Also, the transfers from the engine to cylinder need to be matched - this is not only the case for our Malossi MHR Big Bore cylinder kit, but would be the case for pretty much any other kit too.

We have still to decide what build we are going to do, which moped that is. Tempted to put it under a Ciao, possibly a Bravo. Tell us what you think!

Enough talk. Here are some pics.

See how the stock connecting rod (top rod) is a lot thinner than the 91mm long Top Racing rod right below it? The Top Racing rod is actually even thicker than the Simonini's connecting rod (crankshaft to the left).

This is how the engine will eventually fit together when finished. Inside view with right half of the crankshaft off.

The crankshaft's connecting rod does come awfully close to the crankshaft housing. This will be milled away for more clearance just to be safe.

The piston also reaches deep into the crankcase housing. The part where it nearly touches will also be milled away.

A rear view to the Reed Valve Manifold.

Gasket cut and finished.

The Malossi MHR Big Bore Cylinder!!!

Smooth exhaust port.

In this last picture you can see how the kickstart pinion fits on to the engine

That's all for now. More pics and updates to follow soon!


Fred

Back ONLINE! Keep up with us...

People! We are back.

I've been getting a lot of mails from old customers and people asking me what happened to MoParts Webshop. No worries! We were offline for a short period but will soon be back with some new developments.

We will be launching a new webshop withing the next few weeks. It is basically the same webshop as before (www.moparts-webshop.com) but then newer. Our new webshop platform will be more userfriendly and professional. You can expect the same level of service from us as before! ;)

Furthermore, we are still busy as ever with all our projects. We haven't been idling, we've been going at it at full speed!

Look out for a new update soon regarding a few new crazy projects!

Fred


Thursday, May 5, 2011

CUSTOM SHOW: Scooter-Center Custom Show Germany

It's been a while since an update but here goes!

The last big thing was the custom show in Cologne, Germany. It has been a tradition and I've been there three times now (counting this event). The first two times we've taken home the third prize (out of 180 and 200 contestants respectively), however this time we did not receive a prize. Very disappointing especially seeing which bikes and set-ups we put up at the show.

This is basically what we displayed and set up:
- Sprocatti Citta (the orange bike on the yellow hydraulic lift)
- Black Simonini Citta (the black bike in front)
- Triple Carb Vespa Ciao (the pearl red Vespa Ciao)
- Simonini 4-stud (2007) engine (tuned, with plug and play HPI Ignition in a custom built plexiglas case)

I expected this to draw a big crowd and it surely did. I'm sure most of the visitors were bored of only seeing scooters with custom paints jobs and a different powerfilter - they soon trolled to my stand to witness the real custom stuff. People were immediately attracted by the big oranje bike on the hydraulic lift. They then turned their heads to the Simonini engine on display, pointing and glazing their eyes out, only to find themselves staring at the black Simonini bike and the triple carbed Ciao.

See for yourselves...


Monday, January 17, 2011

Triple Carb. Vespa Ciao

Triple Carbed Vespa Ciao

I would like to introduce one of the latest editions to the family. It is a beautifully manufactured Vespa Ciao with three carbs. A friend of mine built this back in the day (about two/three years ago). He had it up for sale and as rare as it is, I couldn't let this one go.

It still has some small fine-tuning issues to be taken care of.

Let me first give you the full specs:

- Polini Speed Engine (electronic)
- Polini 42mm Aluminium cylinder (30mm exhaust port)
- EuroCilindro liquid cooled cylinder head (milled to 42mm)
- Giannelli Mega exhaust (custom cut and welded for Vespa Ciao, 30mm exhaust flange and header)
- 13/13 Dellorto carb (rear inlet)
- 13/13 Dellorto carb (side-inlet, REED VALVE)
- 18mm Dellorto carb (top cylinder inlet, REED VALVE)
- Polini radiator
- Polini Speed Control variomatic (with a custom 25-degree plate)
- Stock 1:13 Piaggio variomatic transmission
- Aftermarket variomatic clutch (100mm discs, yellow Malossi tension/pressure spring, stock central clutch spring)

Additional parts to be changed or added:
- Pinasco elec. flywheel (weighs only 698 grams).
- Polini waterpump (If I can make this fit on the center opening of the engine cradle)
- Polini reservoir (If I can find one)
- Most importantly, a decent and original clutch with a red Malossi pressure spring and yellow clutch springs)
- Last but not least, Malossi 1:9 Racing Gears

I basically took it over as it is. The only things I will most likely change are the parts mentioned above.

Polini 42mm Reed Valve Adjustments
What my friend basically did as he built this engine and Ciao is the following:
He milled away a large part of the fins on the top section of the cylinder to fixate the Polini Reed Valve kit. By the way, this Polini Reed Valve kit is officially for Puch Maxi.

The side-inlet is also custom. He adjusted the crankshaft for the side-inlet.

Furthermore, it has a 30mm exhaust port.

Fine-tuning
You may ask yourselves whether such an overdose on carbs would ever work. I ask myself the same question. In theory, it should work. In reality, it is extremely difficult to get this right. Which carb needs which jet is hard to determine when fine-tuning something like this.

After having driven it twice (only), I feel that both the side-inlet carb and rear-carb need a smaller jet. The top carb (on the cylinder) may need a larger jet, if not a larger idle-jet. The two 13/13 carbs run correspondingly. The 18mm top carb runs on the push-start-lever! This carb can only be engaged at higher RPMs, otherwise the engine will stall due to, what seems to be, an overkill of fuel.

Also, even with the crappy tuning, the bike is slow off the line. Once I'm going 30 (km/h) and engage the 18mm top carb, it boosts away incredibly. However, when I play with the throttle at and near 0-15km/h, it revs up too much. Clearly, this has to do with the aftermarket stock clutch.

Updates will be added soon!

Fred / MoParts-Webshop


Monday, January 3, 2011

PROJECT: Sprocatti

This project is one of my all time favorites. A long-term project with no time limit and no expense/money limit - I work on it as often as I can.

It's a show bike to the fullest and a drag/race bike any day of the week.


This bike has been nominated throughout several of the biggest scooter/moped custom shows in Europe.

It's live view count, the amount of people that have seen this bike LIVE at custom shows, exceeds half a millon, which is quite an achievement for a bike that was born and built out of a (pretty much) stock garage!

INTERMOT 2008 and 2010
We attended Europe's biggest two-wheel-motorcycle fare, the INTERMOT in 2008. This show attracted about 200.000 visitors over a four day period. We were up against some of the best and most hardcore custom bike builders in the world - take Habermann Performance as an example.

As this is an every-two-year event, In 2010 we were invited to the INTERMOT once again with about 220.000 visitors - that is quite some publicity!


Scooter Center Custom Show (Cologne, Germany)
As expected, we did not win any prizes at the INTERMOT fares, which is reasonable as the competition is world-class. However, we did win prizes at several Custom Scooter Show in Germany, such as the Scooter Center Custom Scooter Show in Cologne. We attended in 2008 and took the third prize for BEST ODDITY (3rd out 180 contestants). In 2010, we again won the third prize for BEST ODDITY at the same show, this time with less contestants, but to compensate, all contestants were pre-qualified based on their custom creations, meaning that it was already a win-win siutation if you were even invited to compete!

3rd Prize - BEST ODDITY

Sprocatti Specifications:
- Franco Sprocatti Motori Rotary Valve Engine
- Parmakit/Sprocatti 50mm (bore) cylinder kit - Liquid Cooled
- 46mm stroke crankshaft
- Dell'orto VHSH 30 carburetor (30mm)
- HPI Internal Rotor Ignition system (custom)
- Sprocatti hand made exhsust (chromed and polished muffler/silencer tips)

- Custom cut and calculated CNC-machined subframe/cradle (specially designed for the Sprocatti engine)

- Reich 12Volt waterpump
- Killswitch
- Double disc brake system (front wheel, fully hydraulic)
- Disc brake system rear (under construction)
- Stage6 12" FULL SLICK tyres
- Yamaha Aerox (Minarelli) Radiator (polished)

Colors:
- Powdercoated white wheels and front end.
- Flip flop pearl orange frame

Saturday, January 1, 2011

PROJECT: Simonini NT


This build is actually a project that I am doing for one of my two wholesalers. Both are greatly into bikes, mopeds, karts, racing, drag races and so on. As I've been building several bikes for show-purposes, such as my Sprocatti project bike, they wanted me to build one for them.

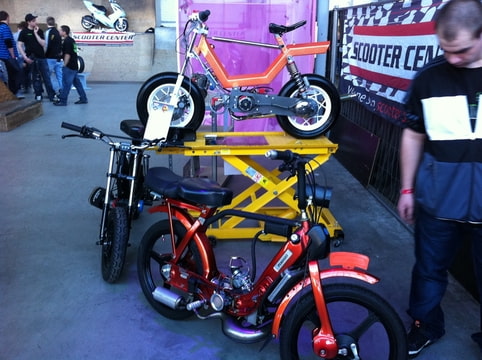
I will be taking this bike to numerous shows around Europe. We'll most likely be racing it too!

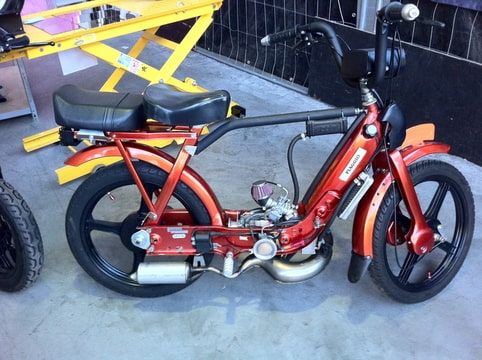
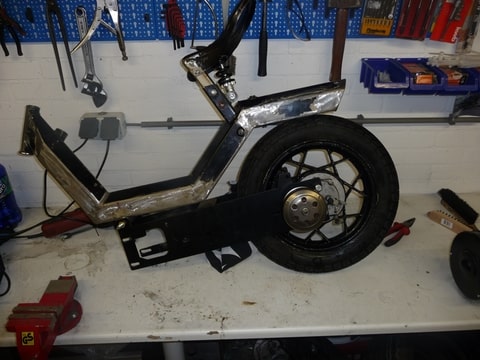
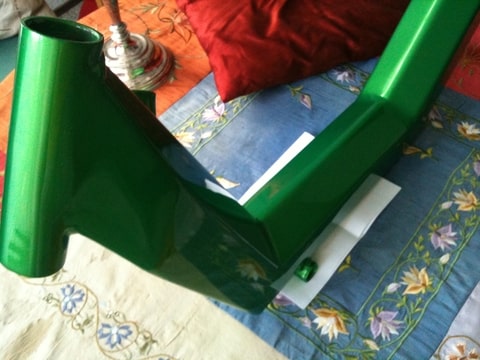
It all started with the frame. I've basically done the same thing as with my Sprocatti Project bike - I took off all the (useless) brackets and mounts. These are meant to hold brackets, fairings, fenders, side panels and what nots into place - USELESS when building a show bike.

Above shows the before and after result of the frame in general. The paint is actually a customised pearl green with a bit of a flip flop effect added to it. I must add, however, that it looks a lot better in real life and light than on pics!

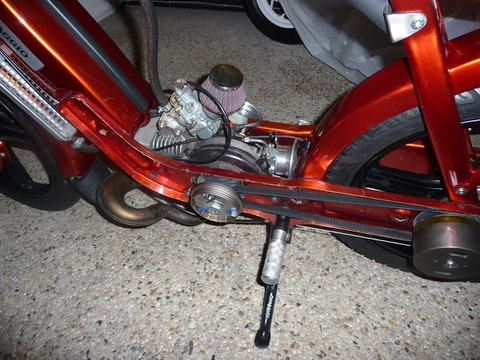
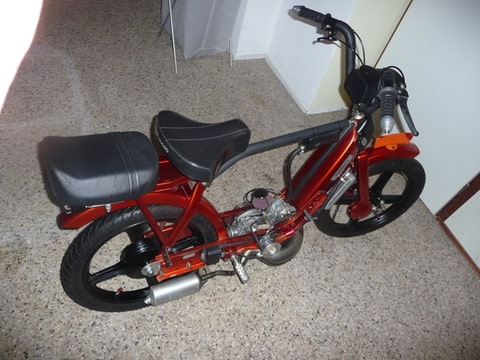
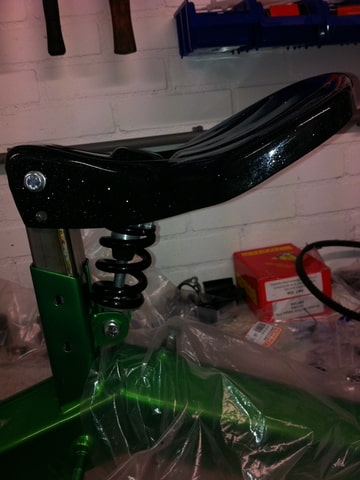
Here's a nice touch we added to the seat pan:
- We've taken a small (160mm long) shokabsorber. This shock was actually meant for minibikes or mountainbikes, but we thought it would look cool as a seat pan spring - and it does.

If you're wondering, the seat pan isn't dusty, it's also a flip flop effect that was powdercoated. Powdercoated black with a clear varnish that has flip flop sparkles in it, so to speak. Again, this pops a lot more in real lighting - the pics don't do it justice! 
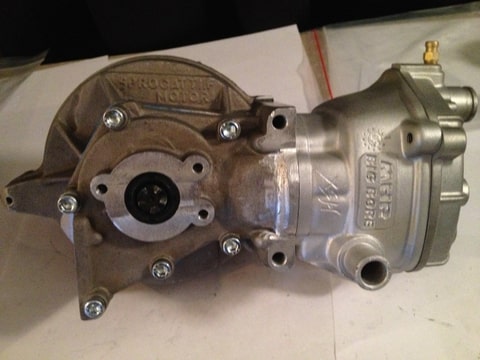
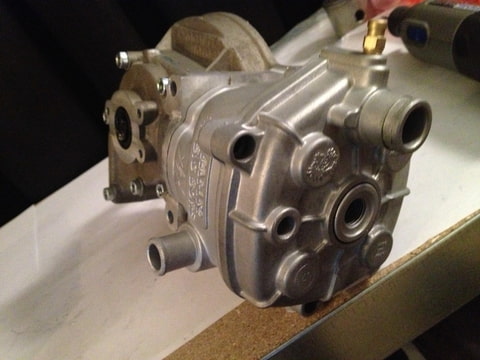
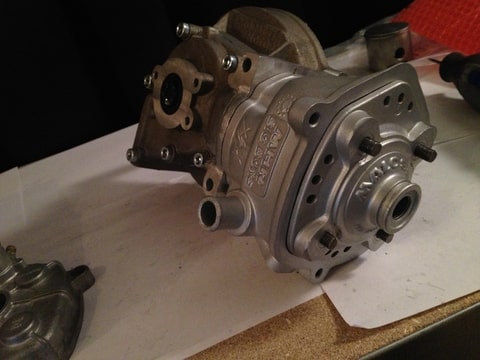
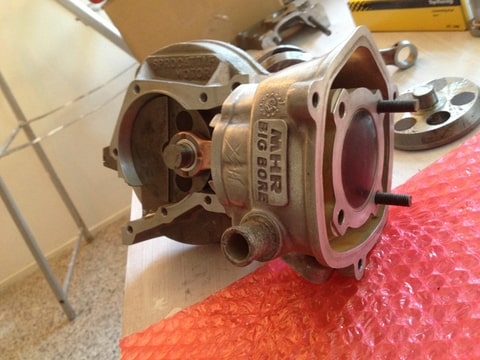
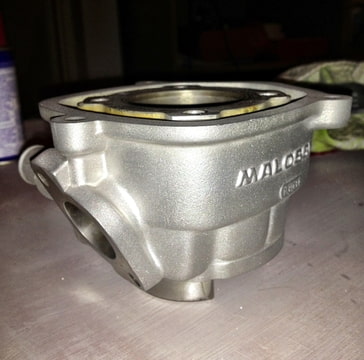
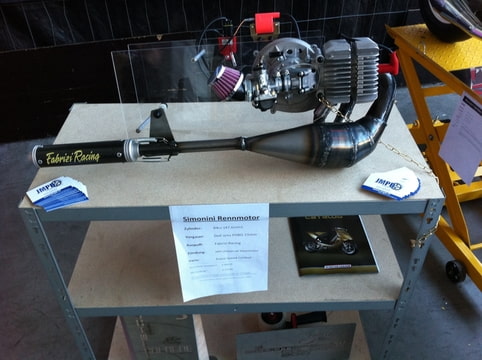
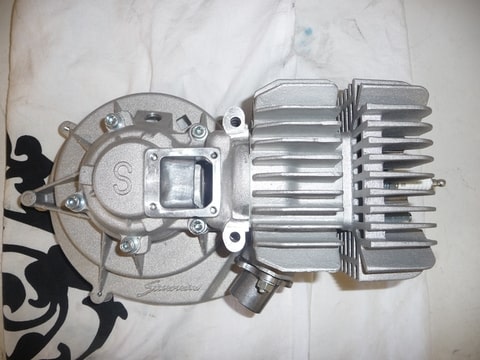
Heart of the Lion
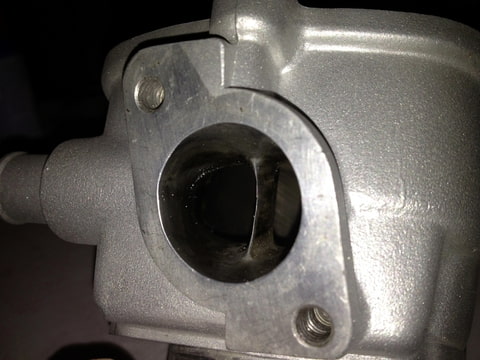
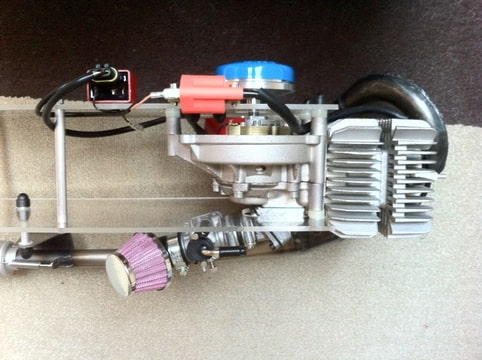
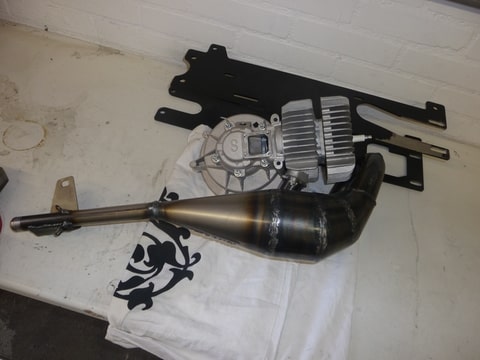
Now, let's go to the heart of this beast, you've guessed it, the 2007 NEW TYPE Simonini Engine. We didn't leave this stock either. I must say, even though I am a huge fan of Simonini and sell their parts on a daily basis, Simoinini totally lacked precision when it comes to the general idea of this engine. Sure, the porting in the cylinder is huge and fabulous, but the ignition and cylinder head are what strikes me as weak and unfinished.


Cylinder head
Let's begin with the cylinder head. The head has no decompression kit/valve. This will make it impossible to start as push-starting it won't work, pedal starting it won't work (no pedals, this is a show bike) and pull starting it sounds decent but still not favorable for a show and race bike.
Solution? Build a decompression valve in your current head, OR, take a Honda Hobbit/Camino/PA50 cylinder head. Obviously, as only the stock (50cc) heads come with a decompression valve, and the FastArrow 46mm heads which are hard to find, you'll have to mill the combustion chamber of the cylinder head to 47.6mm. Pics to follow and thanks Terry for the tip!
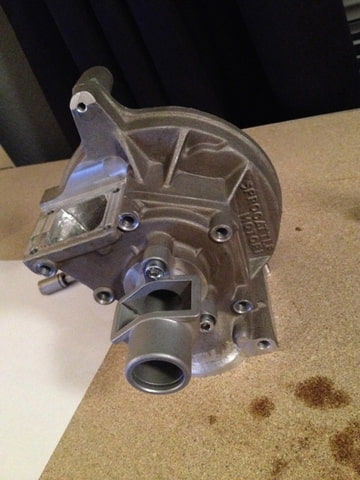
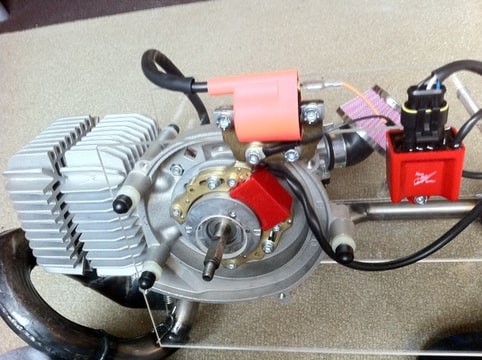
Ignition
As we are criticising this engine, I would like to turn your attention to the ignition system. The instruction booklet, or should I say single sided piece of paper, that came with the ignition system in the complete kit is a big laugh. The drawings look like they were sketched by a small child! Not to bother though, I guess the Italians didn't want to use computers to animate their instruction booklet/piece of paper, but at least do some effort guys - we are paying top bill for this engine so we expect something in return!

Let me put it to you this way; this engine goes for around 900 to 1200 euros depending on where you buy it. People who are willing to spend such a large amount on a little Vespa/Piaggio engine are most likely also willing to spend a couply hundred more on a decent ignition system. Therefore, in my opinion, Simonini should have brought out this engine with a fitted internal rotor ignition if you ask me - a HPI 2007 Internal Rotor Ignition would suffice, I'm guessing!

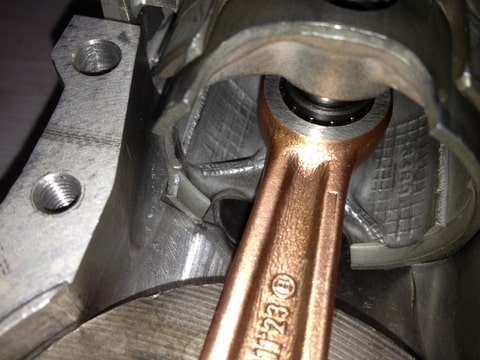
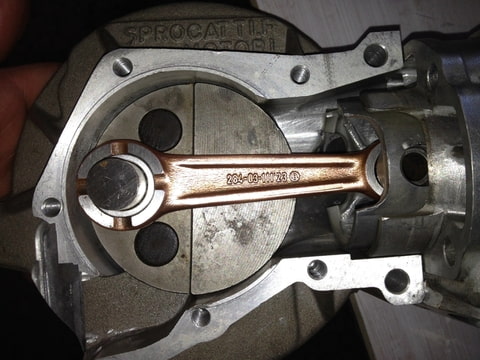
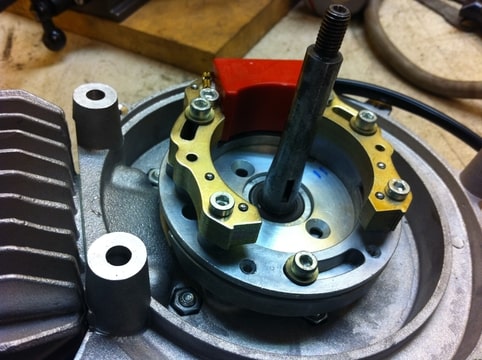
And what I'm guessing is what you're guessing - we are fitting a HPI 2007 Universal Internal Rotor Ignition on that little Simonini engine. Why? Because we can and it's a must if you think about it. The stock ignition will most likely blow after a certain period of time at high RPMs, whereas the internal rotor ignition can easily handle 20000 RPMs without a problem - not that we will be able to rev it to that point, but whatever!

I've customised a stator plate for the engine two days ago and the HPI stator fits like a charm. Maybe we will be machining these plates/adaptors on a CNC-machine to resell them on our webshop, maybe we'll even sell complete HPI ignition kits with these stator plates/adaptors for the Simonini engine on our webshop! Who knows :).


The only thing we still have to do regarding the ignition is adjusting a HPI Rotor to its exact conical position. We may drill out an already existing HPI rotor and custom fit a conical instert (according to the crankshaft's measurements) or we will have HPI supply us with a non-pressed rotor that we can insert our own conical press into - Option two is what we are leaning toward.
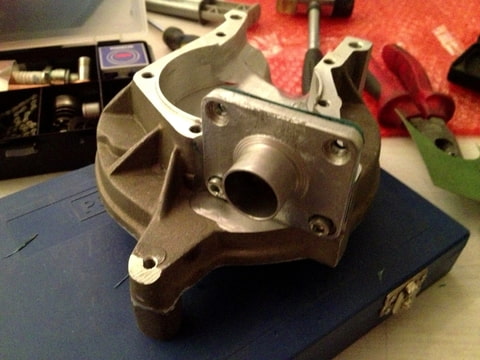
Exhaust
And again, as stock exhausts on a complete engine kit as these are great, we felt that we needed to do something slightly different.

The name is Fabrizi and these are rare - hence why we want to use this exhaust both for show and race purposes. We always have the ''stock'' Simonini exhaust that came with the kit to fall back on.

How do you stop at full speed? Is what I hear you ask.

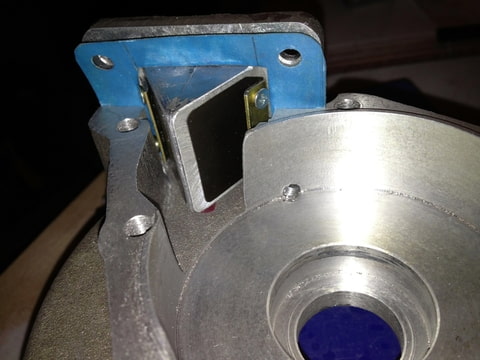
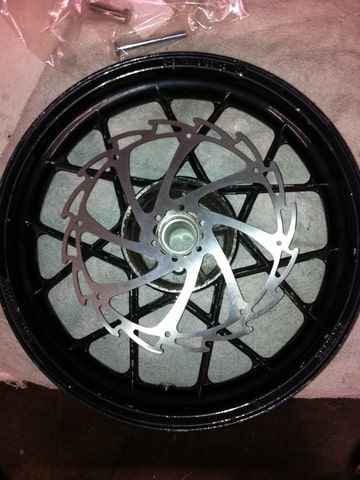
And, of course, disc brakes are the answer. This time, we're going another route - a more slim and sexy route if you will. Instead of using thick and big discs and calipers off a scooter, we will be using mountainbike disc brake systems both on the front and rear wheel.

These babies come with 6-piston calipers and 203mm Wave Discs - not bad at all!


We are nearly finished with the rear wheel's disc brake system - Pics to follow.
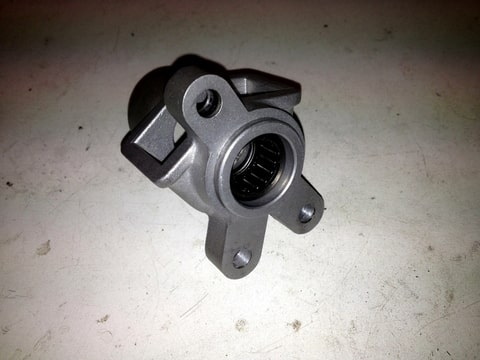
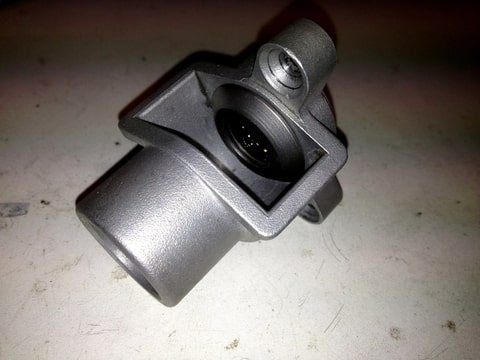
We had to machine our own wheel plate with bearing to hold the whole system together on the rear end in the cradle/subframe (pics to follow). All that is missing is a bracket to hold the caliper.

The front wheel will be milled out on the opposite side of the brake-hub. We will then fit a solid cylindrical milled aluminum piece and press fit it into position. Then, we will mill a 12mm diameter axle. All this rotates around two 2ZR bearings pressed into place in the adaptors.

Thanks for reading so far and make sure to keep checking us out as we try to update on a daily basis!

- Fred