
Full specs:
- Sprocatti Reed Valve Kickstart engine
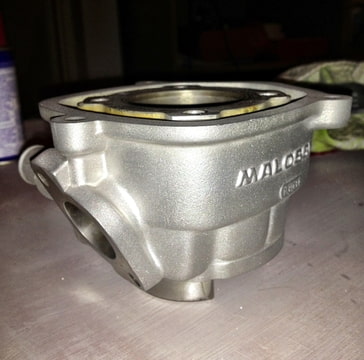
- Malossi MHR Big Bore Cylinder Kit (XSH tuned) Liquid Cooled
- Custom kickstart crankshaft (46mm stroke)
- HPI Internal Rotor
- 21mm Dell'orto Carb
- Exhaust: Not yet chosen / To be determined
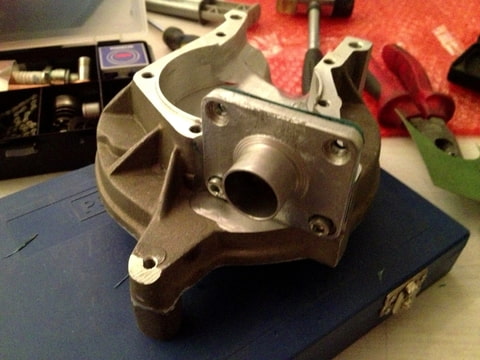
This engine is the "little brother" of the Sprocatti Rotary Valve (Disco Rotante) engine. It's got a nice reed valve port at the rear bottom end of the engine. This is the 4-stud version. It is also available in a 3-stud form so that you can mount normal Vespa / Piaggio cylinders to it (with a push start system).
The reed valve system is actually a manifold and petal system in one. The Malossi cases for Vespa / Piaggio have a seperate V-force 4-petal reed valve system and a seperate manifold. This Sprocatti Reed Valve system is two-in-one. It also has a more direct flow through the chamber to the cylinder (if modified properly). This engine has a lot of potential, but it needs a bit of fine-tuning and finishing before usage, but that's normal if your building a complete engine from scratch.
Kickstart Modification
This engine has the option for a kickstart system. It's not stock. The engine is delivered from Sprocatti with the small case milled falt down but still closed. You need to mill open the small half youself to have the crankshaft fit through. We've already completed this step.
The crankshaft has also already been modified. The bearing pen which sits on the right half of a kickstart crankshaft was pressed out of the crankshaft half. We then milled the a hole into a all-round racing Vespa / Piaggio crankshaft and press fitted the kickstart bearing pen into it.
The normal crankshaft for this scooter cylinder is a 44-stroke. This engine requires a 91mm long connecting rod. We used a Top Racing 91mm connecting rod (originally meant for Zundapp / Kreidler) and fitted this into the crankshaft.
As you can see, all this is needed to properly adjust the crankshaft for this engine, otherwise starting it will be a bitch (just as is the case with our other Sprocatti Rotary Valve engine). The crankshaft adjustment is a precise and expensive modification if you have it done by a third party. Why? Think about it:
As you can see, all this is needed to properly adjust the crankshaft for this engine, otherwise starting it will be a bitch (just as is the case with our other Sprocatti Rotary Valve engine). The crankshaft adjustment is a precise and expensive modification if you have it done by a third party. Why? Think about it:
- You need to buy a kickstart set (crankshaft, pedals, spring, axle, etc.; difficult to find!). You will need to sacrifice the crankshaft as you only need the kickstart part off it.
- You then need to press it or have it pressed out.
- A new crankshaft is needed, preferably a 46mm stroke crankshaft for a Liquid Cooled cylinder kit.
- To be on the safe side you may want to place a thicker connecting rod into the crankshaft. The stock Vespa / Piaggio ones are rather thin and weak. I'm sure they would hold, but a Top Racing connecting rod from a Zundapp / Kreidler is only about 30 euros (45 dollars) and is far thicker and sturdier.
- The crankshaft then needs to be refitted and aligned properly.
Fine tuning
The finishing on the engine is acceptable, but it's definitely advisable to break out the pro-tuning tools to finish the engine off properly. The cylinder has already been tuned by a Dutch tuning company, XSH. The inlet of this Sprocatti Reed Valve engine can still be raised and widened if desired. Also, the transfers from the engine to cylinder need to be matched - this is not only the case for our Malossi MHR Big Bore cylinder kit, but would be the case for pretty much any other kit too.
We have still to decide what build we are going to do, which moped that is. Tempted to put it under a Ciao, possibly a Bravo. Tell us what you think!
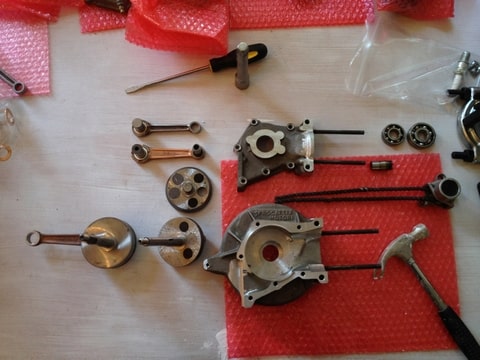
Enough talk. Here are some pics.
See how the stock connecting rod (top rod) is a lot thinner than the 91mm long Top Racing rod right below it? The Top Racing rod is actually even thicker than the Simonini's connecting rod (crankshaft to the left).
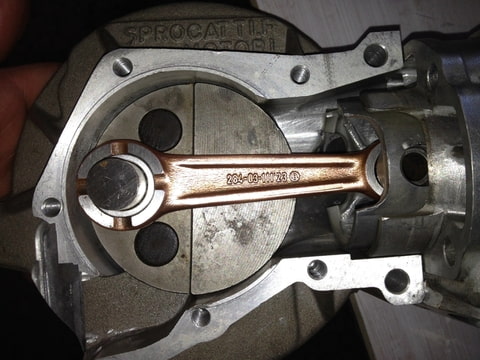
This is how the engine will eventually fit together when finished. Inside view with right half of the crankshaft off.
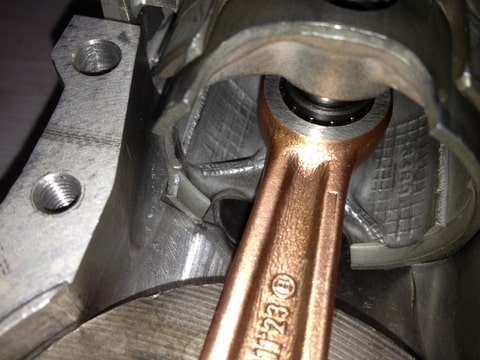
The crankshaft's connecting rod does come awfully close to the crankshaft housing. This will be milled away for more clearance just to be safe.

The piston also reaches deep into the crankcase housing. The part where it nearly touches will also be milled away.
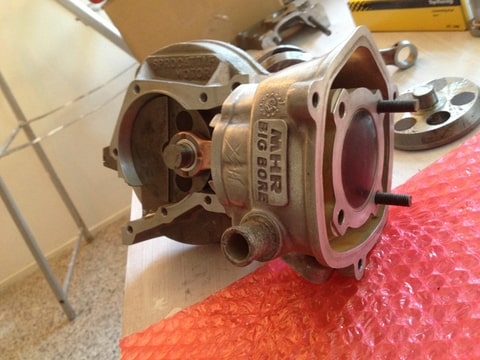
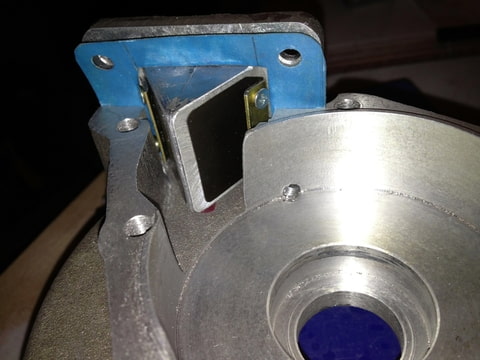
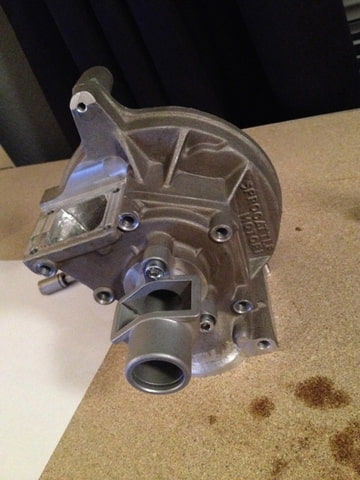
A rear view to the Reed Valve Manifold.
Gasket cut and finished.
The Malossi MHR Big Bore Cylinder!!!
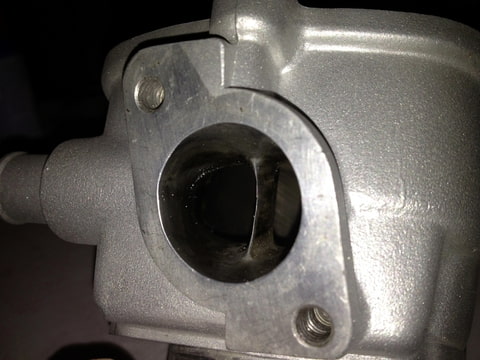
Smooth exhaust port.
In this last picture you can see how the kickstart pinion fits on to the engine
That's all for now. More pics and updates to follow soon!
Fred
Put this beast in a ciao. So sick Fred!
ReplyDeleteI´d like to, still contemplating. The Ciao frame will need a lot of modification to house both the engine and the cylinder + head, but it is very intriguing to build another Ciao...
ReplyDelete